Understanding True White Whitening System
Achieving a brighter, whiter smile is a common goal, and the True White Whitening System offers a convenient way to achieve this from the comfort of your home. This comprehensive guide will walk you through everything you need to know about using the True White Whitening System effectively and safely. From understanding the system’s components to aftercare tips, this guide is designed to help you achieve optimal results and maintain a dazzling smile. Before starting any teeth whitening treatment, understanding the process, the product, and the potential outcomes is crucial. Let’s dive into the details to ensure you’re well-prepared for your whitening journey.
What is True White Whitening System?
The True White Whitening System is an at-home teeth whitening kit designed to lighten the shade of your teeth. Typically, the system includes custom-fit trays, a whitening gel containing a bleaching agent (usually hydrogen peroxide or carbamide peroxide), and detailed instructions. The system works by applying the whitening gel to your teeth using the trays, allowing the bleaching agent to penetrate the enamel and break down stains and discoloration. The primary goal is to help you achieve a noticeably whiter and brighter smile, boosting your confidence and improving your overall appearance. Different kits might include additional items like a shade guide to track your progress and desensitizing gel to minimize sensitivity. The key is to follow the instructions carefully for safe and effective results.
Ingredients & Components

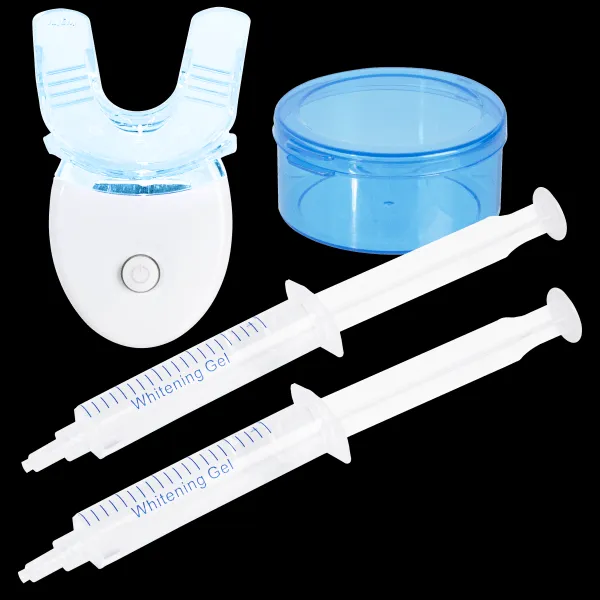
Understanding the ingredients and components of the True White Whitening System is vital for safe and effective use. The key ingredient in the whitening gel is typically hydrogen peroxide or carbamide peroxide, which is the active bleaching agent. The concentration of this agent can vary, and it’s essential to choose a product with a concentration that’s appropriate for your sensitivity level and the extent of staining. The trays are usually made of a flexible, clear plastic material that is designed to fit comfortably over your teeth. The kit may also include a shade guide to help you track your progress, as well as instructions for use. Knowing these components will help you understand how the system works and how to use it properly.
Preparing for the Whitening Process
Before you start using the True White Whitening System, proper preparation is key. First, it’s advisable to consult with your dentist. They can assess the health of your teeth and gums and determine if teeth whitening is suitable for you. If you have any existing dental issues such as cavities or gum disease, these need to be addressed before whitening. Next, you’ll need to clean your teeth thoroughly. Brush and floss your teeth to remove any food particles or plaque. This ensures that the whitening gel can effectively reach the surface of your teeth. Also, read the instructions carefully. Familiarize yourself with each step to avoid any mistakes during the process.
Consultation with a Dentist
A dental consultation is a crucial first step. Your dentist can evaluate your oral health, check for cavities, gum disease, or other issues that could affect the whitening process. They can also provide professional advice and guidance, ensuring that teeth whitening is safe and appropriate for you. Your dentist can also identify the cause of your tooth discoloration, which is important because different types of stains respond differently to whitening treatments. They may also recommend professional cleaning before you start using the True White Whitening System to get the best results. This consultation is an investment in your oral health and the effectiveness of your whitening treatment.
Assessing Your Teeth Shade

Before you begin the whitening process, assess your current teeth shade. Most True White kits include a shade guide, a tool that helps you determine the starting point of your teeth’s color. Compare your teeth to the shades on the guide to find the closest match. This will give you a baseline to track your progress throughout the whitening process. Take a picture of your teeth next to the shade guide at the beginning of your treatment. This will allow you to visually track the changes in your teeth shade over time. This step helps you to objectively measure your progress and manage your expectations about the whitening results.
Step-by-Step Guide Use True White
Using the True White Whitening System effectively involves following a clear, step-by-step process. This ensures that you get the best results while minimizing any potential side effects. Adhering to the manufacturer’s instructions is critical, as it ensures the product is used correctly. Here’s a detailed guide to help you through each step of the process, from preparing the trays to cleaning up.
Step 1 Preparing the Tray
The first step is to prepare your whitening trays. If your kit includes custom-fit trays, make sure they fit your teeth comfortably. Clean the trays before use to remove any dust or debris. If your kit has a ‘boil and bite’ tray, you’ll need to soften the trays in hot water, then carefully mold them to the shape of your teeth. This ensures a snug fit, which is essential for keeping the whitening gel in contact with your teeth and preventing it from leaking out. A well-fitting tray maximizes the effectiveness of the treatment and minimizes the risk of gum irritation.
Step 2 Applying the Whitening Gel

Once the trays are prepared, the next step is to apply the whitening gel. Carefully squeeze a small amount of gel into the tray. Follow the instructions provided in the kit for the correct amount. Avoid overfilling the tray, as this can cause the gel to leak out and irritate your gums. Make sure the gel is evenly distributed along the inner surface of the tray where it will contact your teeth. Use the applicator tip provided in the kit for a precise application. Proper application ensures that all the tooth surfaces are exposed to the whitening agent.
Step 3 Inserting the Tray
After applying the gel, insert the tray into your mouth. Position the tray carefully over your teeth, making sure that all the teeth are covered by the gel. Gently press the tray onto your teeth, ensuring that it fits snugly and comfortably. Remove any excess gel that might have squeezed out onto your gums with a clean finger or cotton swab. This is important to prevent irritation. This step is crucial for ensuring the gel remains in contact with the teeth for the prescribed period.
Step 4 The Waiting Game
Once the tray is in place, follow the recommended time specified in the instructions. This can range from 30 minutes to a few hours, depending on the product and the concentration of the whitening agent. During this time, avoid eating or drinking anything, as this can dilute the gel and reduce its effectiveness. You can do activities like reading, watching TV, or relaxing while you wait. The waiting time is a critical component, as it allows the whitening agent to penetrate the enamel and break down stains. Staying patient and following the recommended duration is essential for achieving the best results.
Step 5 Removing and Cleaning

After the recommended time, remove the tray from your mouth. Rinse your mouth thoroughly with water to remove any remaining gel. Clean the trays meticulously after each use. Rinse the trays with cool water, and use a toothbrush to gently remove any remaining gel. Store the trays in a clean, dry place until the next use. Proper cleaning and storage are essential for maintaining the trays’ hygiene and extending their lifespan. It also ensures that the whitening process is carried out safely and effectively.
Aftercare & Maintenance
Aftercare is as important as the whitening process itself. Proper aftercare can help you maintain your bright smile and minimize potential side effects. It involves dietary adjustments, maintaining good oral hygiene, and regular dental check-ups. Consistency in your aftercare routine will help you prolong the results of your whitening treatment and keep your teeth healthy. Let’s look into the specific aspects of aftercare to ensure optimal results and oral health.
Foods and Drinks to Avoid
Certain foods and drinks can stain your teeth, especially after a whitening treatment. To maintain your bright smile, it’s best to avoid or limit the consumption of these items. Coffee, tea, red wine, and dark-colored sodas are notorious for staining teeth. Foods like berries, soy sauce, and curries can also cause staining. If you do consume these items, rinse your mouth with water immediately afterward or brush your teeth to minimize staining. Avoiding these foods and drinks will greatly assist in maintaining the results of your whitening treatment.
Maintaining Your Bright Smile

Maintaining your bright smile involves practicing good oral hygiene and making lifestyle adjustments. Continue to brush your teeth twice a day with fluoride toothpaste. Floss daily to remove plaque and food particles from between your teeth. Regular dental check-ups and professional cleanings are also essential. Your dentist can identify and address any issues early, as well as provide professional teeth cleaning to maintain your bright smile. Consider using a whitening toothpaste to maintain the brightness of your teeth. Staying consistent with these habits will help to preserve your bright, white smile for the long term.
Potential Side Effects
While teeth whitening is generally safe, it can cause side effects in some individuals. The most common side effect is tooth sensitivity, which can range from mild to moderate. Some people may also experience gum irritation, which can manifest as redness or soreness. These side effects are usually temporary and subside shortly after the treatment. If you experience any severe side effects, or if they persist, it’s important to consult your dentist for advice. Being aware of these potential side effects will help you manage your expectations and prepare for any discomfort.
Managing Sensitivity
Tooth sensitivity is a common side effect of teeth whitening. Here are some strategies to manage it. Use a toothpaste designed for sensitive teeth. These toothpastes contain ingredients that help block the tubules in your teeth, reducing sensitivity. Avoid extremely hot or cold foods and drinks, as they can trigger sensitivity. If the sensitivity is severe, take breaks between whitening treatments to allow your teeth to recover. Your dentist can also recommend desensitizing agents, such as fluoride treatments. Taking proactive steps to manage sensitivity will help to make your whitening experience more comfortable and enjoyable.
When to Consult Your Dentist

While at-home whitening systems are convenient, knowing when to consult your dentist is crucial. If you experience severe tooth sensitivity or gum irritation that doesn’t subside within a few days, contact your dentist immediately. If you notice any changes in your teeth or gums, such as increased pain or swelling, seek professional advice. If your teeth whitening results are not what you expected, and you are not satisfied with the outcome, your dentist can help you explore alternatives or adjust your treatment plan. Regular dental check-ups are essential to monitor your oral health and ensure that your whitening treatment is safe and effective.
Maximizing Results & Tips
To get the best results from the True White Whitening System, here are some tips to maximize your results. Start by consulting with your dentist to ensure you are a good candidate for teeth whitening. Follow the instructions in the kit carefully, and don’t skip steps. Be patient; results may take some time to become visible, and consistency is key. Limit your consumption of stain-causing foods and drinks during the whitening process and after. Consider using a whitening toothpaste to maintain the brightness of your teeth. A combination of these strategies will assist you in achieving the best and longest-lasting results.
Consistency is Key
Consistency is crucial for the success of the True White Whitening System. Follow the recommended treatment schedule and duration, as skipping treatments can diminish the effectiveness of the system. It’s important to maintain good oral hygiene habits, including brushing and flossing regularly, to enhance and maintain the whitening results. Regular maintenance helps to prevent new stains from forming. Combining the whitening process with consistent oral hygiene practices ensures you get the most from your teeth whitening treatment. Consistent application and care lead to the most noticeable and long-lasting improvements in your smile.
Realistic Expectations

Setting realistic expectations is essential. Teeth whitening results can vary depending on the individual’s teeth and the type of stains. Some people may achieve dramatic whitening, while others may experience more subtle changes. The shade of your teeth will likely lighten, but the extent of whitening will depend on factors like the type of stains and the natural color of your teeth. Be patient, and track your progress using the shade guide provided in the kit. Remember that whitening is a process, and it may take several treatments to achieve your desired results. Consulting with your dentist can help you understand what you can realistically expect and assist you in managing your expectations.